Transcript
Never be afraid of experimenting. Many years ago, I tried model aircraft dope (a clear lacquer) and Acrylic Matt Medium as fixatives. Crazy, I know, and not methods I’d dream of using – but occasionally these weird experiments actually lead to a useful discovery. I stumbled upon indenting by accident too - by mistaking a 6H pencil for a 6B. And Indirect Indenting arose from that, because it permits prior planning. If you’re uncertain about using indenting and concerned about ruining a drawing with a misplaced or shaky indent, then indirect indenting might be a good starting point.
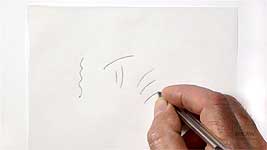
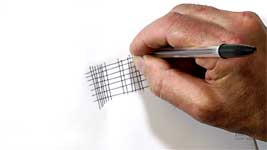
Try this: it might help you discover if indirect indenting will be of use to you: Outline a 4 in (10 cm) box on your drawing paper. Then position tracing paper over the top of the box, and you should be able to see the box through it. Later, try other transfer sheets too. Maybe cellophane packaging will work? Or greaseproof paper? Never be afraid to experiment. Now use a hard-grade pencil or pen - a fine-point ballpoint pen works well - to draw a series of curved and straight lines on the tracing paper. Apply firm, constant pressure - and you must have a smooth and hard surface beneath your paper. The use of this method, instead of indenting directly into your paper’s surface, has some advantages, such as having full sight of the drawing beneath at all times, and being able to indent without potentially harming the paper’s surface. Remove the tracing paper and lightly shade over the entire area with the flat face of a soft-grade pencil, such as a 4B or 6B, to expose the indents.
Another advantage of indirect indenting is the visible lines left on the transfer sheet. Unlike direct indenting, when additional indents are made you know exactly where the previous ones were placed. And it guarantees that no paper fibres will be lifted or torn, particularly if you're indenting soft or coarse paper. Now apply a little more pressure with your pencil to darken the shading. The indented lines might develop softer edges, but that's fine if it's the look you want to achieve. However, soft edges is one of the disadvantages, and why I discarded this technique many years ago, but you might find it useful.
Indenting is often most effective in areas of high contrast, so keep applying additional pressure until the shading is very dark. At this stage, the indents might begin to collapse. Of course, as with all indenting methods, lines indented in error cannot be removed, but errors, with this method, are less likely to occur. As I mentioned, the lines are visible on the tracing paper, especially if you used a pen. So, with Indirect Indenting, you can either indent spontaneously, as I've been doing, and
know where the indents are, or you can plan your indents ahead of time.
You can plot all the indentations by drawing them onto the tracing paper first and then indent your paper by tracing over them with a hard-grade pencil or pen, or your indenting tool, which is my preference. After applying a light layer of 6B graphite, the result at first looks promising. However, it's been my experience that the marks are not sharp-edged, and further applications of shading will probably collapse those edges - often quite dramatically.
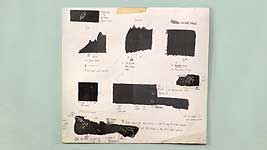
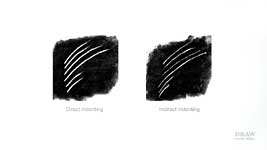
This is Direct Indenting - And this is Indirect. Identical shading was applied to both of them. The lines that were indented directly into the paper’s surface with a stylus display clarity, and are sharply defined. The marks created with the indirect indenting technique have partially fragmented and broken their edges. But this technique is very useful if you haven't tried indenting before. And you can be more adventurous, because there is no direct stylus-to-paper contact.
Intersecting lines, for example won’t tear or lift the paper’s fibres, which can be a problem on soft or short-grain papers. Indenting is, of course, a "one time" technique - you can't afford to fail - so, being able to plan on the transfer sheet first at least allows you to pre-plan the position of your indents.
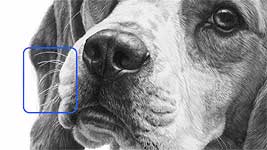
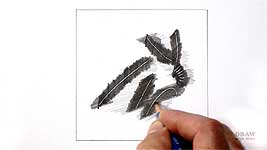
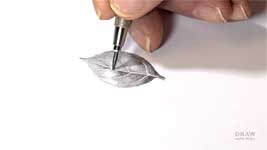
Think long and hard before using indenting. For example, as I explained in Indenting Basics, I would never use indenting, of any kind, for veins in leaves. These indents look unnatural. They are too clean and stark, because veins in leaves aren't naturally hard edged. They steeply curve in and out so one side is in shade, the other catches a highlight, and the centre transitions between the two. Use indenting only where it is appropriate and no other technique will produce the desired results.
Of course, I can't show you examples of indirect indenting in use - because I don't use it - so let's have a look at what JD Hillberry, a Master Artist, can do with it.
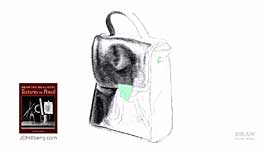
Here, JD has lightly outlined the subject and the edges that define major changes in value. He'll use Indirect Indenting to create the texture of leather, which has a surface covered with minute fissures - little valleys and crests.
Frisket is applied to protect the smooth surfaces of the clasp and grommet. Then a sheet of tracing paper is laid over the drawing. Tape it in place if that helps to keep it from moving. Now, using a sharp 6H pencil, create grooves in the tracing paper using sufficient pressure to transfer them to the paper below. You'll notice JD has also used broader grooves to form stitching around the bottom edge of the top flap. Using this technique, you can see the indents you've already applied, and position new indents accurately. Of course, when you remove the tracing paper your visible lines will disappear. Don't panic! Because they will magically reappear as you begin shading. Initially, keep that shading light, so you can see where your indents are. Then you can engineer the indents for a natural appearance as you complete the area.
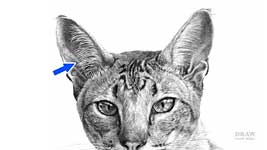
With the shading completed, JD removed the frisket, and carefully rendered the metalwork for a superb result. And the indirect indenting produced a totally believable texture.
If you've decided indenting is a worthy addition to your stock of techniques, and I think it is, there are three methods you can choose from. Indenting Basics covered direct indenting. You are now familiar with indirect indenting, and next time I'll introduce you to the magic of graphite indenting.
© copyright: Mike Sibley 2019